Understanding networks Final - Restful API
 - December 04, 2018
Assignment : “Over the next three weeks, you’ll design RESTful web interface to a physical device. Your device can either be a controller that sends data to the web interface, or an actuator that is controlled by the web interface.”
For this 2 part assignment we were working in pairs. I was working with Keerthana and our assignment was the following:
1: Create a physical controller for Jason and Roxanne’s light system. Meaning we would create the client-side system communication with their server.
2: Create a web interface/projection that Roland, Sandy and Kellee would build a controller for. Meaning we would create a server for another group to connect to.
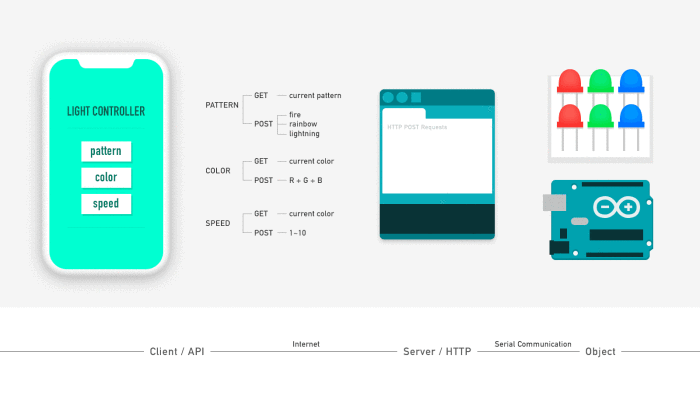
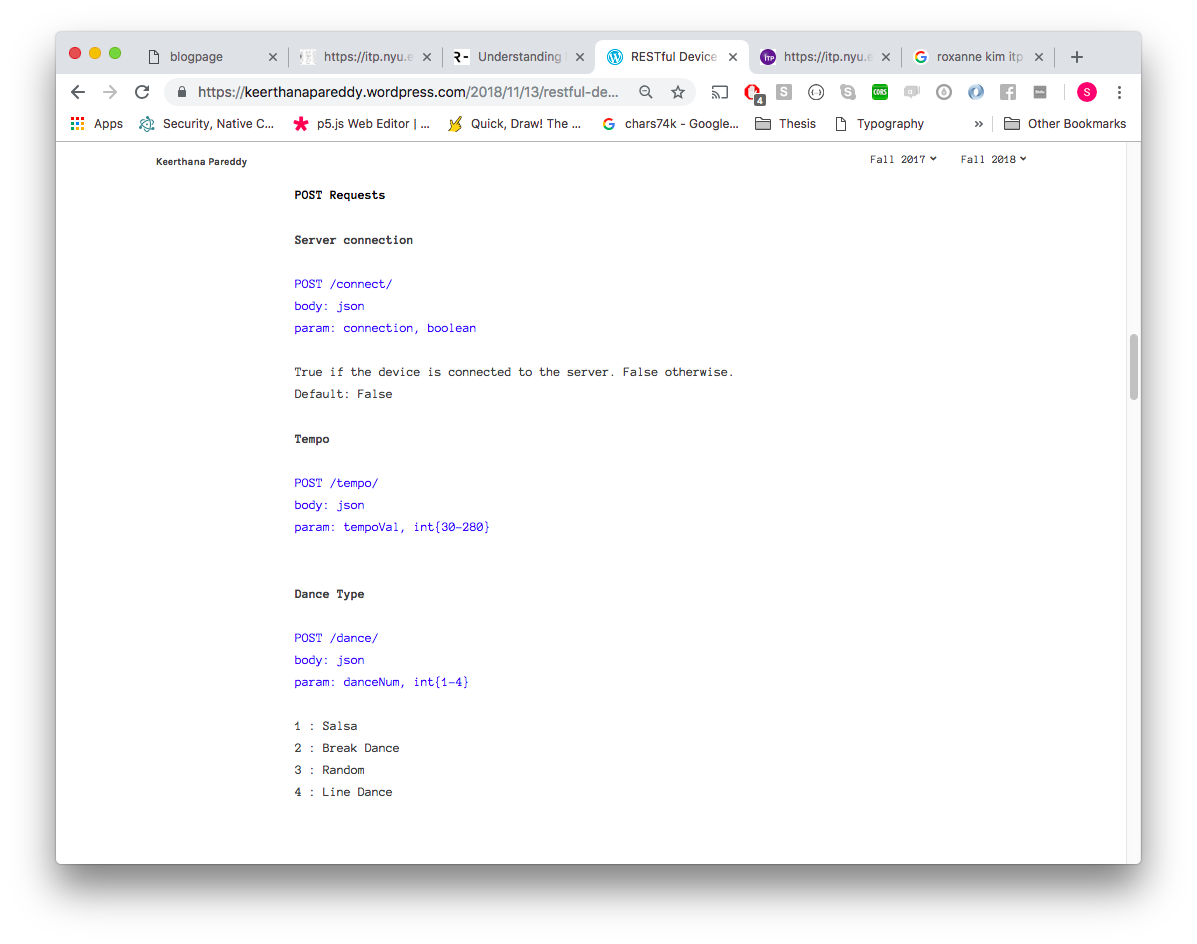
All communication had to be orchestrated with the RESTfull API using HTTP requests such as GET, PUT, POST and DELETE to communicate between our devices. This meant that we would need to agree with the other groups on specifications like url routes and parameters to update. Initially this is what the specifications looked like:
Physical light controller - that we would make updates with:
Our projection server - that another group would make updates to:
Part 1
Physical controller for light:
Based on the API we received from Jason and Roxanne we knew that there were three parameters to update:
- Pattern
- Color
- Speed
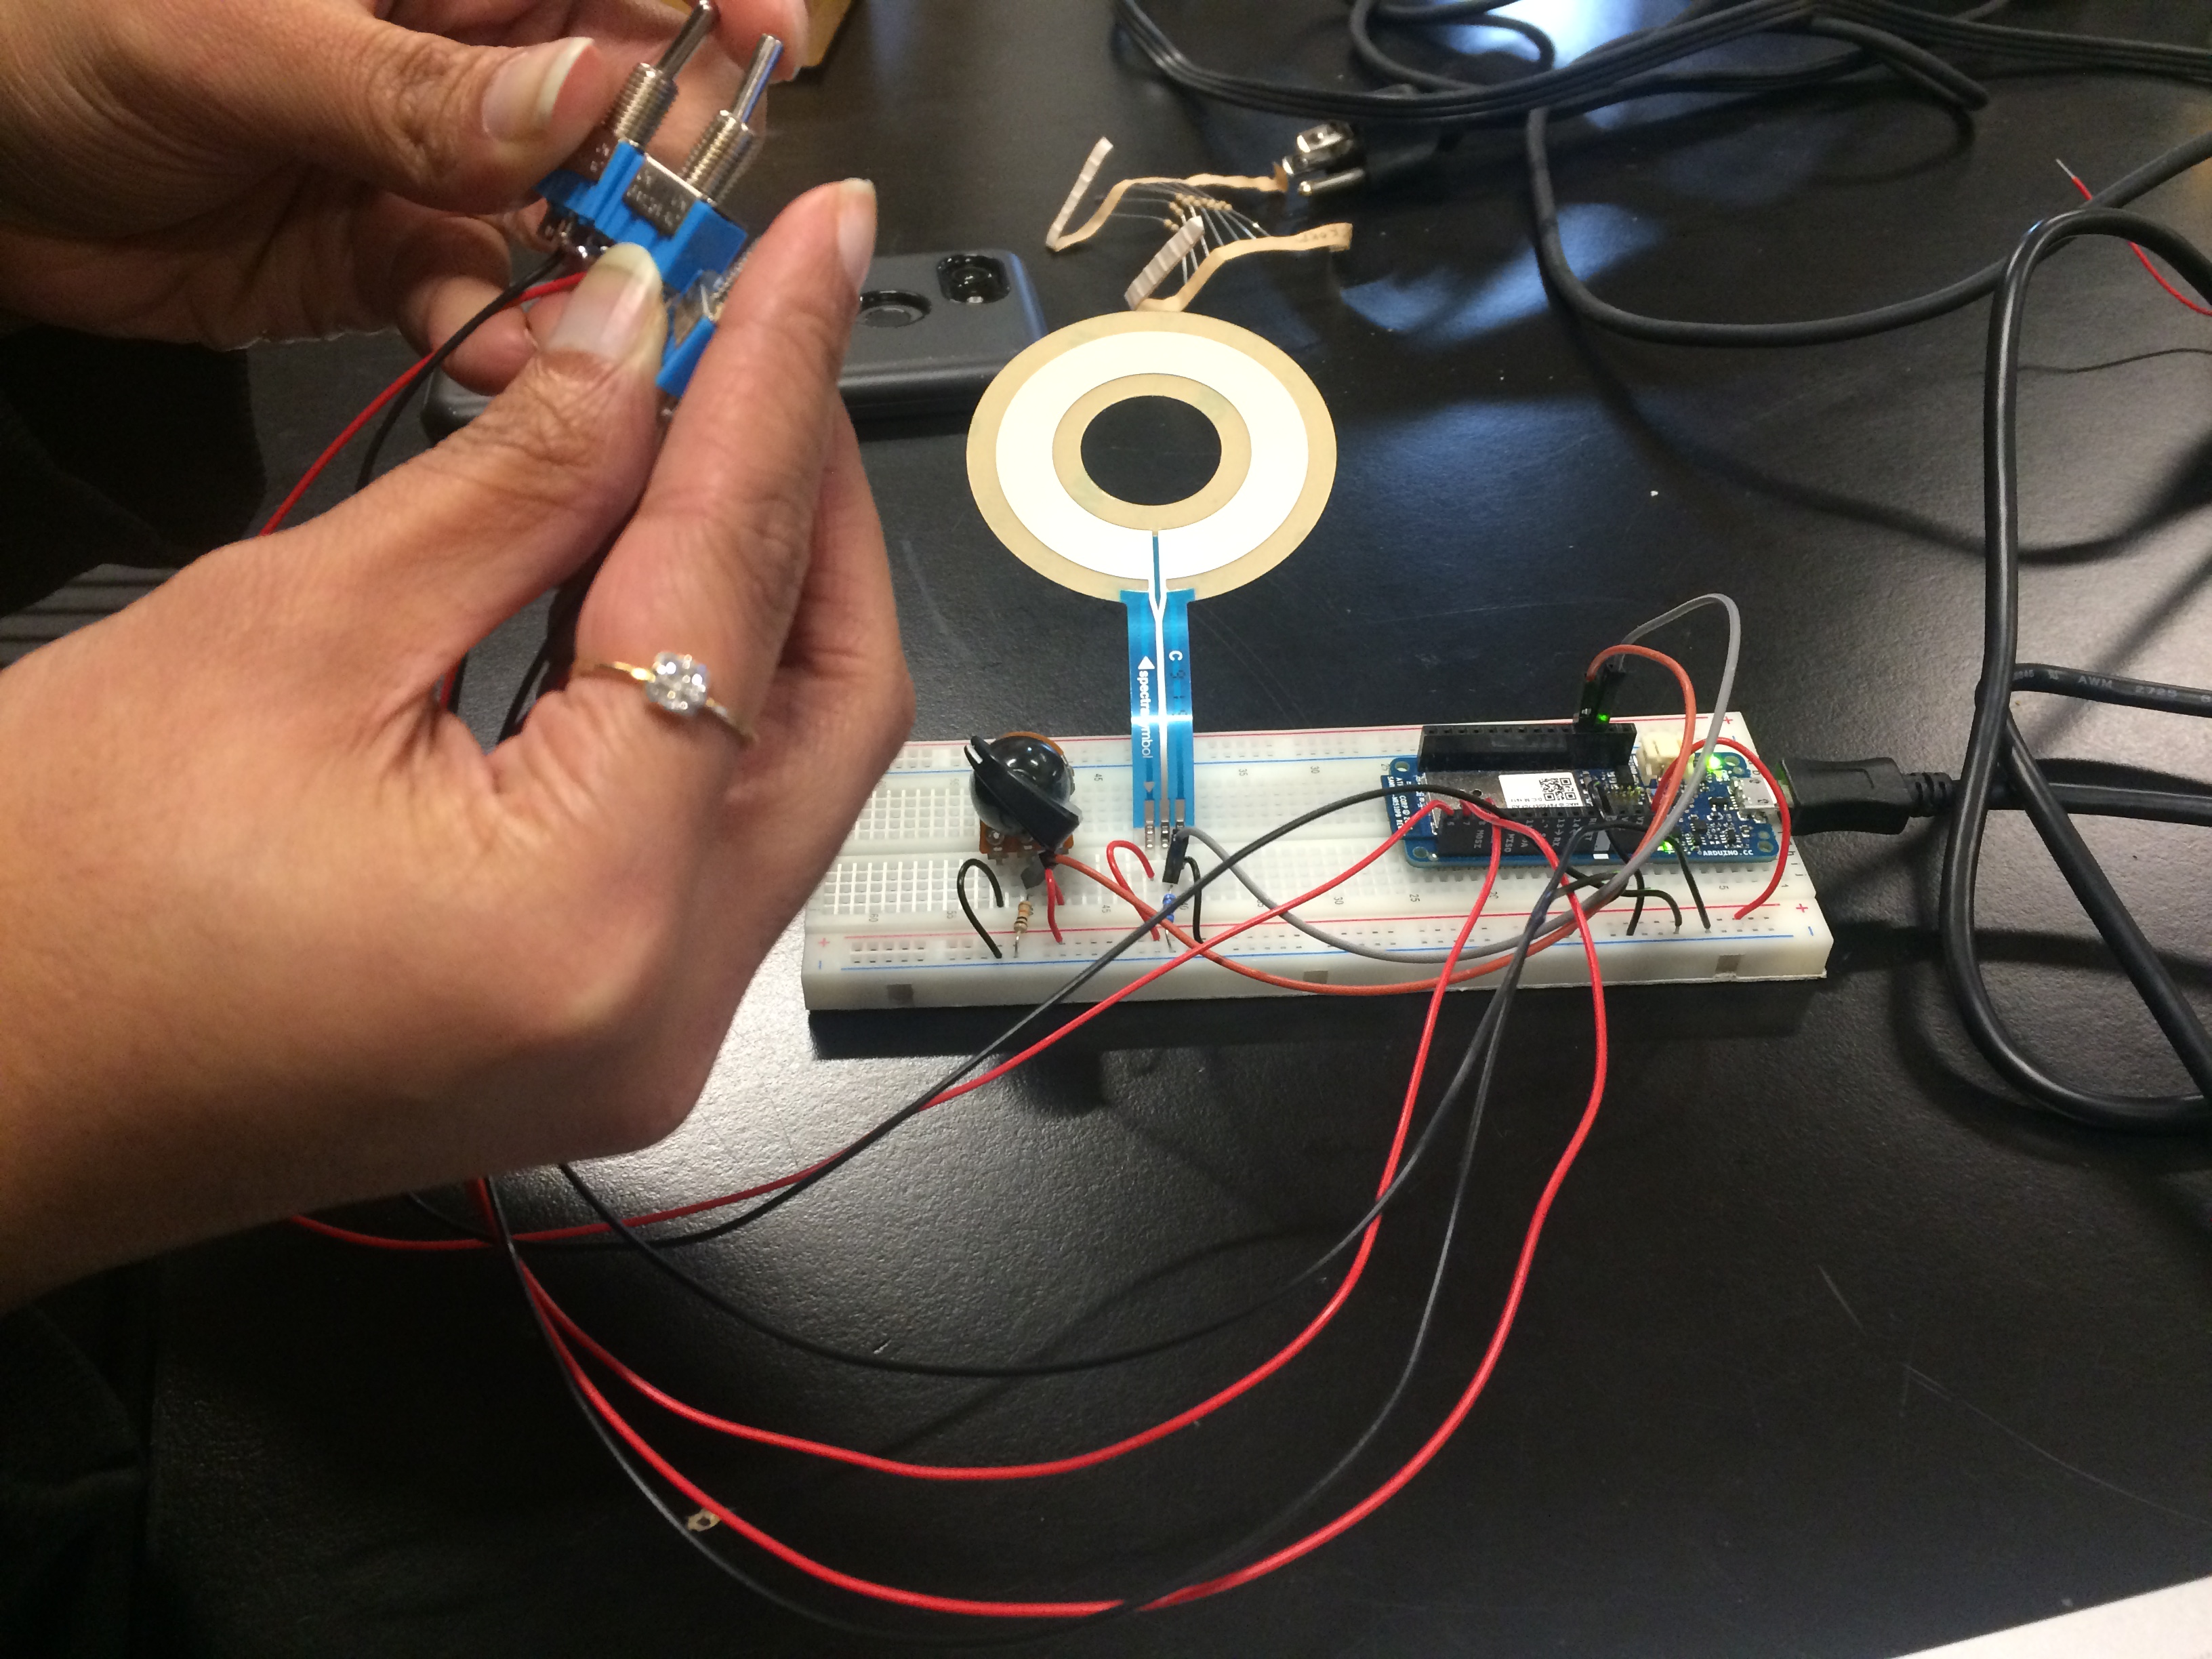
We agreed that a wifi-connection led was necessary, as all communication would happen over wifi using the Arduino maker 1000. We agreed to use switches for the pattern states (Fire, Rainbow, Lightning), a circular soft potentiometer for color and a chickenhead knob potentiometer for speed.
To get started with our arduino code we used the TestHTTPClient example from Tom Igoe’s “Making things talk 2” repo on github. We made sure our buttons were sending the correct outputs using the serial monitor and tested the post requests on our “example API” before connecting with the other group.
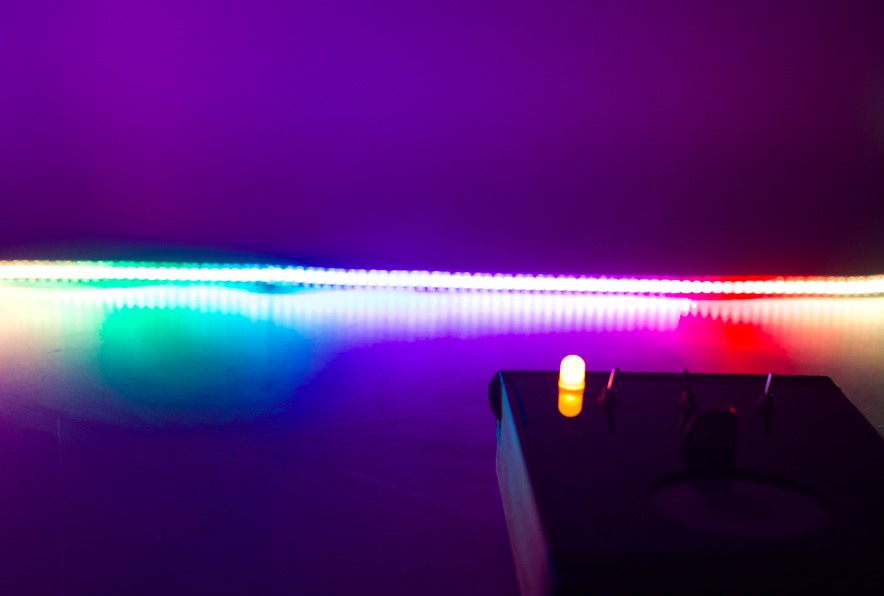
Ideally, at this point, connecting to the other group would be a simple task, but as some changes had been made in the specifications - this took a little extra time/adjusting. When we had our controller connecting the the server, we “beautified” our controller. This was the final result.
The code for the arduino controller can be seen here.
The code for the light-server can be seen here here
Part 2
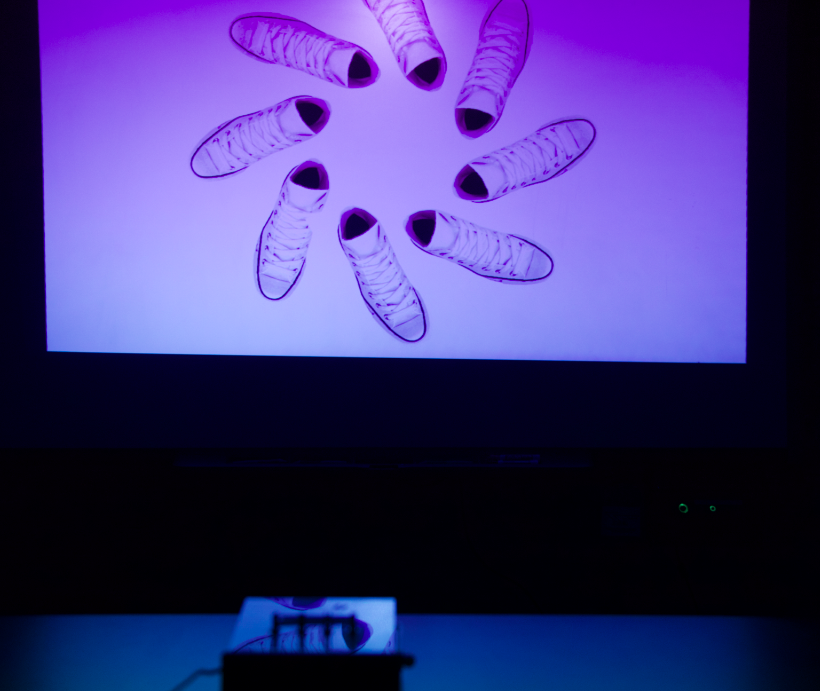
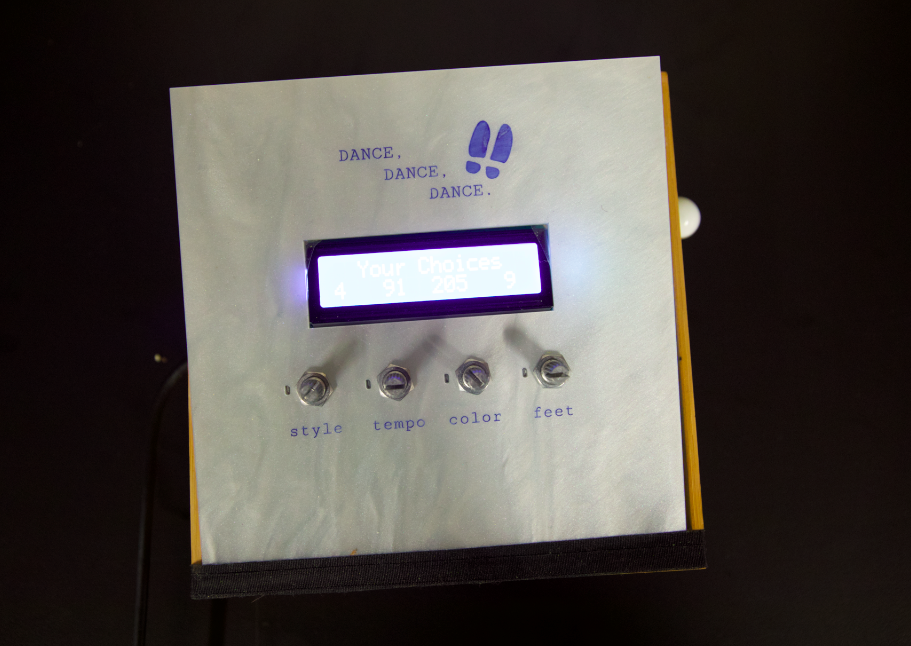
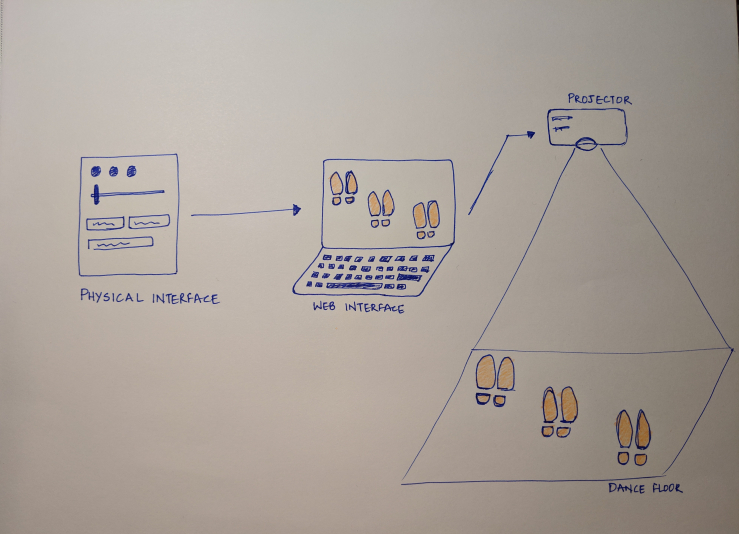
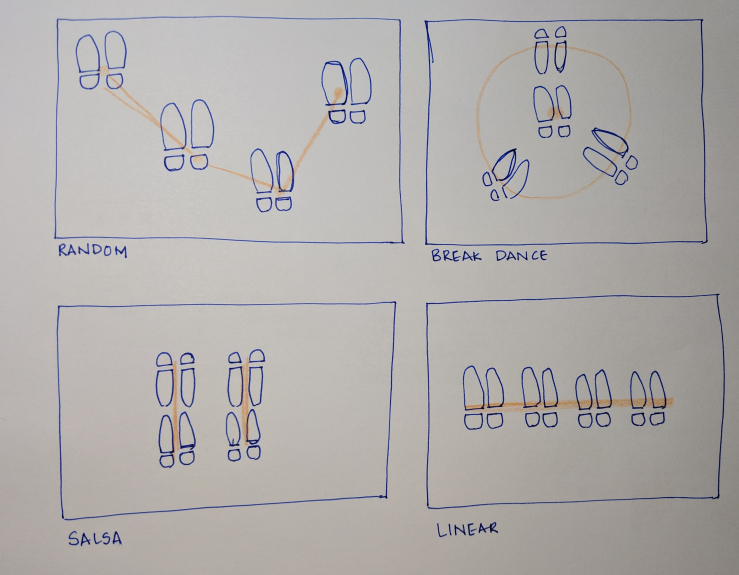
For the other part of the assignment we asked a group to create a physical controller for a projected visual. We wanted to create a dancefloor where you could see the feet of a number of people. Depending on the type of dance the feet would reorganize.
The parameters to control were:
- Server connection
- Tempo
- Dance type
- Number of people
- Color
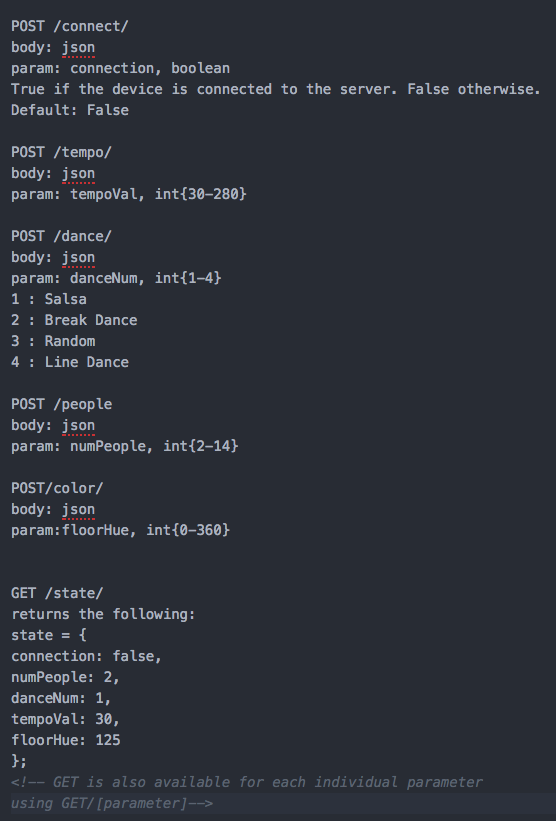
For our visuals/projection project we set up a an HTTP server and created an object of global variables called “state”. State contained all the parameters that could be controlled using the post requests from the controller built by another group.
Structure of get requests that would return the requested variable.
server.get("/state", (req, res) => {
  res.json(state)
});


server.get("/connect", (req, res) => {
  res.json(state.connection)
});

server.get("/people", (req, res) => {
  res.json({
    "people": state.numPeople
  })
});

server.get("/tempo", (req, res) => {
  res.json(state.tempoVal)
});

server.get("/dance", (req, res) => {
  res.json(state.danceNum)
});

server.get("/color", (req, res) => {
  res.json(state.floorHue)
});
Example of server response to a post request. This is example is telling the user to connect to the server before making changes.
server.post("/connect", (req, res) => {
  //True

  // state.connection = !state.connection
  state.connection = true
  if (state.connection) {
    res.json({
      message: "You are now connected to the server"
    })
    io.sockets.emit('state', {
      connection: state.connection,
      numPeople: state.numPeople,
      danceNum: state.danceNum,
      tempoVal: state.tempoVal,
      floorHue: state.floorHue
    })
  } else {
    res.json({
      message: "You disconnected from the server"
    })
    io.sockets.emit('state', {
      connection: state.connection,
      numPeople: state.numPeople,
      danceNum: state.danceNum,
      tempoVal: state.tempoVal,
      floorHue: state.floorHue
    })
  }
});
In order to get an instant update with the results from the POST request we used sockets to connect the back-end and front-end. This way we would get an instant update to the new parameters passed into the global container (“state”)
After some small adjustments this is what our combined projects looked like.
Serverside code can be seen here
A few images of the projects: